Showing posts with label landscape design. Show all posts

Friday, May 6, 2011

Happy Native Plant Appreciation Week


Did you know it was native plant appreciation week in Washington state?  I didn't either until I saw our local Native Plant nursery Woodbrook post it on their Facebook page.  To celebrate, I submitted this years plant order to them and went and picked up the plants today!  We've been working on our native plant landscape for the 3 to 4 years now.  We've done it in phases because one, it is hard work, and two, it costs money.  This year, we're completing our backyard plant landscape.   (Is anything ever really done?)

Over the course of the winter, I put together landscape drawings that take into consideration our light and moisture levels.  There is an awesome resource made available by King County that helped us immensely.  The Northwest Native Plant Guide is an online resource that catalogs native plants in a searchable index.  It also provides sample landscape design plans, which is super helpful.  Hopefully one day Pierce County will provide something as comprehensive.  I found the website particularly useful to print their designs and use them as reference for my own design.  Once I got our design complete, I put together a shopping list of plants with quantities.  This makes getting and identifying what you need a lot easier, or at least it did for us.  I was able to provide this list to Woodbrook, and they pulled all of the plants in advance and had the order ready for us.

We chose native plants for several reasons.  First, they have low to no water requirements, which is a major objective for our landscape.  They also build great habitat, and provide food and shelter for wildlife.  In addition, native plants are in line with the Arts and Crafts design principles - which is to use local materials and design elements whenever possible.

Not all of our landscape is native, nor is that really practical if you are trying to feed yourself.  There are many edibles found in Washington, such as Miners Lettuce, Salmon Berries, etc., but it is our desire to grow a much more diverse edible landscape.  Therefore, I have found mixing lower-maintenance natives with fruit trees and garden annuals and perennials to be particularly useful.

Next up is to start planting, and then sit back and watch it all grow!

Sunday, October 3, 2010

Pond progress

This weekend I completed joining the two ponds together into one larger pond.

From 2010 Landscape


To join the ponds, I dug a section between the two, laid a new piece of liner, and fused the pieces together using an EPDM pond liner joining kit.

From 2010 Landscape


Shown here is one section of the two EPDM pond liners, with one piece braced to a 2x6 ready to be joined together.

From 2010 Landscape


Right after the sections were joined, and the water level was brought up. The connector section will be covered with a plank style bridge, so the two sections won't look so obviously joined together once complete.

From 2010 Landscape

Once the plank bridge and landscape rock is in place, I'll upload the final pictures.

Saturday, September 25, 2010

More pond progress

Made more progress on the pond this weekend. Got the skimmer attached to the liner, so that part of the project is now complete.

From 2010 Landscape


Started to drain our original pond into the new pond to bring the water-level down enough to allow me to fuse the liners together.

From 2010 Landscape


Next, we have to fuse the liner pieces together, install the bridge over the channel connecting the two ponds, and then trim the liner, fix the edging, and fill the remainder with water. Once all that is complete I can move the pump from the old pond into the new pond, and connect it to the new water lines running to the waterfall that I installed earlier in the year.

Saturday, September 18, 2010

Pond 2.0 continued...

I started out this year with great expectations. I think I got a little carried away because here I am at the end of the season with a bunch of projects to try and finish. I made some progress getting the second pond installed, which I'm hoping to partially complete before the end of the season. I originally wrote about this project a few months back.

I got the rest of the pond dug, the skimmer installed and the underlayment laid down. Next up is the install the liner and to begin building the inside walls of the pond using landscaping basalt rock. We already have a lot of rock for the project, but I suspect I may need to bring more in.

Here are some photos of the progress:

From 2010 Landscape


Pond is approx. 16" deep at the deepest point. This pond is intentionally more shallow than our original pond so that we'll be able to see the fish easier.

From 2010 Landscape


Underlayment installed. Next up, install EPDM liner.

From 2010 Landscape


Installed skimmer. This will house the pump, and will help to remove debris off the surface of the water.

Sunday, August 29, 2010

Fence installed

This weekend I made more progress on the potager. I installed appox. 38' section of fence that borders the south property line. Next up is to finish the fence trim and begin building raised vegetable beds. Hopefully I'll get at least a few of the beds in before the rain season starts. That'll help me get started with the 2011 growing season as early as possible.

From 2010 Landscape

Sunday, August 15, 2010

Potager paths and patio are in!

It's been one of the hottest weekends of the year so far. Nonetheless, I was able to finish the brick work for the paths and patio through the potager garden. That's one project I can now mark off my list!

Photo of the final product:
From 2010 Landscape

Next up is to build the arbors over the paths and haul in dirt to fill the space so that it's all the same level as the paths and patio. Maybe I'll do that once it cools down a bit.

Sunday, July 25, 2010

Our urban wasteland kitchen garden

Our kitchen garden started out as a driveway if you recall. Last year we managed to break up and haul out 30+ tons/1800 sq. feet of what was the former driveway. Don't worry, we still have enough driveway to park three cars. This newly claimed area was to allow for two additions: a kitchen garden and an orchard. The orchard is well on its way and the 7 new fruit trees are all doing well.

From 2010 Landscape


I've been a little behind on the kitchen garden/potager. First, this area looks a lot like an urban wasteland since it's as hard as a rock, has poor drainage and not a stitch of plantable soil. Pretty much the single worst set of qualifications for a kitchen garden. Earlier this year I wrote about the project plan for this area and how we're going to transform it into a kitchen garden/green space.

To start the garden project, in the last couple of weeks I managed to get the concrete block retaining wall installed that borders between our kitchen garden space and the 5+ acre lot next to us. The property line is marked with a low creek area that flows with water all winter and helps prevent us from floating away. To help prevent erosion and minimize the risk of flooding, we installed a retaining wall and dug the creek out. In addition, we're raising the soil level of our property approximately 4".

From 2010 Landscape

My least favorite aspect of this project is that when it's all said and done, you won't even be able to see this retaining wall since it will be behind our fence. It was just one of those necessary projects that had to be done to move to the next step.

After finishing the retaining wall, I started laying the brick paths. The kitchen garden is a long shotgun area (18'x36') and will be a high trafficked area since it's the main way to get to the back of the house. Therefore, I wanted permanent paths that were wide enough to haul supplies and lumber to the back where our workshop is located. Today, I completed the first section of the path using brick I found on Craigslist.

From 2010 Landscape
This path will tie into a small 9'x10' patio that will be directly viewable from the picture window in our dining room, and will then connect on the other side with another short path that goes to the gate to our backyard.

As you can see from the picture, the area is very rocky. The dirt is hard packed clay that's impossible to get a shovel in. Eventually, to finish this area I will be building a series of 10+ raised beds for planting in. Once the raised beds are built, I'll haul in decent soil soil. I don't expect to start getting the raised beds built till next year, but it's a perfect late winter/early spring project.

I hope to complete all of the brick work for this by the end of August. I have to balance this task with painting windows and trim, since we're trying to finish up the house painting project. Before you know it, it'll be the rain season here again, but at least this year I'll be standing in front of the picture window looking out and admiring the nice brick work.

Sunday, May 9, 2010

The orchard is now open

As I sit here typing this, I can remember few times being as tired and completely satisfied as I am now. This weekend we managed to plant 9 fruit, nut and berry trees, numerous edible bushes, two ornamental trees (for fun), and a handful of edible herbs. It's a food forest in 24 hours or less!

The past two years I've measured, sketched, erased and re-sketched the food forest of my dreams. The plans are the result of many influences, including the Permaculture class I took last year taught by Toby Hemenway, and numerous books including Gaia's Garden by Toby, How to Make a Food Forest by Patrick Whitefield and the Raintree Nursery catalog and their helpful staff.

You may remember the story of our driveway removal project from last year. After the removal of 32 tons of concrete, we had finally exposed 1500 sq. feet of "dirt". Not the kind of dirt you could plant in, but dirt nonetheless. From there, we set to work building boxes, hauling in soil, and building up the area in preparation for our food forest. Today, we're finally seeing the plan come to life with the installation of cherries, apples, pears, almonds, apricots, peaches, figs, currants, hops, mulberries, kiwi, blueberries, tea and various other plants I'm probably forgetting to mention. In 3-5 years time, our effort will being paying off with bountiful harvests.

Here are a few photos. It's hard to get a good picture since most of the plants are still dormant. I'll be uploading more pictures as they come out of dormancy.

From The Making of a Craftsman Home


From The Making of a Craftsman Home


The project is far from complete. This year, we're under planting our orchard with many annual vegetables because we lack the space to put them elsewhere. Starting next year, the portager, which I'm building on the other half of the land salvaged from the driveway should be finished which will allow us to add many more understory bushes and ground covers in the orchard.

Enjoy ~

Sunday, March 28, 2010

Raised Orchard

We'll soon be receiving the fruit trees we ordered this winter for our orchard. To prepare, I went out a couple of weekend ago to start preparing the holes, and to my disappointment, the ground was absolutely saturated with water. I was reminded that we live in an area with very little perk (think wetland). The only way to fix this issue on our property is to build raised planting areas. With a little more rock (5 tons to be exact) and some cedar boxes, we're ready to plant the six dwarf fruit trees we'll be receiving this year.

Before Photo:

From The Making of a Craftsman Home


After Photo:

From The Making of a Craftsman Home

Sunday, March 7, 2010

One gate down

Completed the new garden gate to compliment the section of fence I finished a couple of weeks ago. Went with the same vertical slat style as the rest of our fence, but with a little embellishment on the top to help distinguish between what is fence and what is a gate.

From The Making of a Craftsman Home


Overall, a very simple design. I used a frame and panel design using lap joints to hold the frame together. I cheated on the skinny short slats that appear to protrude through the cross member :-) In fact, they do not. I considered cutting mortises, but then decided I'd like to get the project done in a day. Who will know besides for me and all the readers of this blog? Next step is to find attractive hinges and to mount. I've been looking at the extensive hinge selection at Van Dykes.

Happy to have this gate done. I have about 5 more to build in total, and I'm not sure when I'll get them all done. The design of this one was quite simple, so at least I'll know how to do it when the time comes.

Friday, March 5, 2010

Spring potager

We're starting to collect the needed supplies and building materials for our outdoor spring projects. This year we intend to build the potager, which is a fancy French work for kitchen garden. Our kitchen garden is on the south side of the house in the former area of the driveway. Last year, we went through the painstaking task of removing 30+ tons of concrete to make available 1800 square feet of dirt!

From The Making of a Craftsman Home


The "dirt" that's underneath the driveway is hard pack clay and rock fill, which isn't exactly perfect for a kitchen garden. On top of that, it doesn't drain at all and tends to hold standing water right next to the foundation of the house. Again, not good. Therefore, we're going to dig out a good portion of the fill dirt and bring in new soil and lay drains. To accomplish this little task, we've got to shore up the creek that runs alongside our property that helps carry away the winter rains. We were lucky enough to find large landscaping blocks for an incredibly reasonable price that we're going to use to shore up the creek.

From The Making of a Craftsman Home


Upon completion of that, we'll then be able to dig out a good portion of the fill dirt/rock where the beds are going to be and haul in dirt. Once all that's complete we plan on laying a brick path and patio for a finished look. Over the paths, we're building craftsman style pergolas to allow for better use of the vertical space with items such as pole beans, hops, etc.

Here's the latest pile of bricks I collected for this little project.

From The Making of a Craftsman Home


Once all that's complete, we should be able to plant an onion and perhaps some lettuce by August. Ha! Who knew something as simple as a garden could turn into so many steps. I guess I wouldn't have it any other way.

Wednesday, December 30, 2009

2010 garden planning

I've got one thing on my mind in the dead of winter, and that's the upcoming growing season! After two years of garden planning, hauling dirt, removing concrete, etc., I can start to get serious about planting the remaining trees and getting the production garden ready. I've spent the past two months flipping through my Raintree Nursery catalog, and have chosen a few select edible and ornamental varieties to plant next year.


  • Olympia Blueberry: Small antioxidant packed blueberries.
  • Bluecrop Blueberry: A larger blueberry. More productive, but less antioxidants.
  • Ananasnaja Kiwi: Nothing beats fresh kiwi fruit picked directly from the vine. I ordered three plants in total, one male, and two females.
  • Asian Pear: This particular dwarf pear tree contains four Asian pear varieties.
  • Fig (Madeleine Des Duex Saisons): Figs do exceedingly well in the Pacific Northwest, and are an extremely attractive and productive fruit tree.
  • Hops: Both golden and tettnang hops for interest, and for beer making in the future.
  • Russian Tea: A small bush, reaching 2-3 feet in height. The leaves are picked and used to make a black tea. This one is entirely for fun!
  • Kwanzan Flowering Cherry: This will work perfectly in my Japanese inspired Pacific Northwest landscape design. The flowering cherry will add color and interest during the early spring months of the year.
  • Paper Bark Maple: I went back and forth on this decision, but I've decided to plant a Paperbark maple alongside the pond and waterfall as a focal point. This maple is very slow growing and remains small to medium size with pruning.
  • Red and Black Currant: Why not. I know nothing about Currants, but they were thrown into my order for free.
My original thinking was to plant all of the fruit trees in the area where we tore out our driveway, but I have since changed the plan. Instead of planting all the fruit trees in one area, I have now decided to scatter them around more throughout the landscape. By doing this, I've reserved more room on the south side of the house for sun loving production berries and vegetables.

A friend of mine introduced me to a permaculture themed website recently that's had a huge affect on my garden plan. I strongly recommend a visit to PathToFreedom.com if you're planning an edible food production garden.

Next up on the list is to determine what vegetable varieties to grow next year and to place a seed order. For Northwest gardeners, I strongly recommend Territorial Seed Company, which selects varieties compatible with our cool climate. I've been ordering from Territorial for 4+ years now, and have had an excellent experience. I'll be keeping my order small this year, since we've got a large number of house projects planned for 2010, so we'll have our hands plenty full.

Are you planning your gardening for the upcoming year? Post a comments, and share your spring time dreams.

Thursday, October 8, 2009

Pushing the limits...

Fall is known for one thing in the Pacific Northwest: rain. Thankfully, this year we've been blessed with day after day of excellent weather. I know one thing for sure - it won't last forever. Come November 1st, the rain/flood season bears down.

Given my poor blog posting performance, I thought I'd take the time to put together a compiled list (mostly pictures) of the past months activities.

Let there be red - Chinese Red!

When we first picked the house colors, we went with a moss green, bramble wood brown, and terra cotta orange. No matter how hard I tried, I just couldn't force myself to like the orange. It just wasn't working for me. So... I went to the paint store and found the most striking color I could find -- Chinese Red. I'll let the pictures speak for themselves.

From The Making of a Craftsman Home

Scraping, scraping, scraping, and then more scraping.

I'll say one thing -- this paint doesn't fall off the house by itself.

From The Making of a Craftsman Home

DIRT!

Remember that 15 cubic yard truck load of dirt? Welcome to the new vegetable garden. Hard to believe that just 3 short months ago this was the driveway. Now that's what I call progress of the green type. Next year, I'll be planting lettuce, beets, squash, onions, leeks -- and more. Stay tuned.

From The Making of a Craftsman Home

Water?


Just two years ago our property was completely flat and the water had nowhere to go. Now, there's barely a flat spot remaining -- plus, there are two wetland water retention pools and a drainage creek that directs water over to the stream that runs alongside our property. In addition, I'm installing new gutter downspouts that carry the water away from the foundation. All of this will either work really well, or fail miserably and we'll float away. Hard to say when you live on a former wetland.

From The Making of a Craftsman Home

From The Making of a Craftsman Home

More Trees

At one time, we had two trees in the backyard. Now we've got so many trees that each time we count them -- we come up with a different number. There is somewhere between 20 and 24 trees in the backyard of varying sizes. Recently, I planted an Oregon Ash and several Quaking Aspens. Both of these trees are native to the Northwest. The Oregon Ash loves water and can put up with wet feet. I planted it on the edge of the wetland water retention pool. The Quaking Aspens also love water, and are found in valleys along rivers in the Northwest.

From The Making of a Craftsman Home

There is light at the end of the tunnel -- between dusk and dawn that is

In our spare time, we installed a set of low-voltage craftsman style lights. I really dislike outdoor solar lights since the batteries fail after about the first year, and then they aren't very bright. Therefore, I hardwired a set of low voltage lights.

From The Making of a Craftsman Home

What's next?

Let's face it -- the good weather is about the end. My guesstimate is that the rain will start in the next couple of weeks. From here on out, it's all about the inside of the house.

Monday, September 14, 2009

From concrete to green strip

Building a green strip down the south-side of our house in place of the existing driveway has been a huge project in the making. First step was to remove approximately 1500 sq. feet of concrete (32 tons total), followed by weeks of raking up rocks and broken concrete bits. I knew going into this project that it would be a huge job, but I think we still under estimated the effort involved. As with all large projects, this one is paying off big in personal satisfaction.

This weekend was one of the final steps in the transformation: hauling in fresh top soil that will eventually become the substrate for the vegetable garden and orchard. There is still a lot of preparation before the project is complete, but it's coming together nicely. We're racing against mother nature to try and finish this project before the rains start falling and the fall/winter season begins pouring on us. I'm looking forward to the calm months ahead.

The goal is to have a small scale edible garden in place by spring 2010. We're closing in quickly on successfully reaching our goal.

From 2009 Landscape

Sunday, August 2, 2009

An arbor in an afternoon

I woke up today and had no idea which project to work on. So, I decided to start a new one that I could finish in a day.

I built this arbor over the main pathway into the backyard that will eventually support vines. Not sure exactly what I'm going to plant, but I'm thinking kiwi and/or hops.

Project supplies:

11 1"x1"x8' for the top grid
2 2"x4"x8' for the side horizontal sections
4 4"x4"x8' vertical posts

I used all pressure treated lumber, but not the stuff with the visible perforations on the surface. I just think that lumber looks bad, but it would probably last longer.

First, I used post-hole diggers to set the poles, and then I attached the horizontal 2x4 members. I cut the ends at an 11 degree angle to give it a craftsman look. Then, I placed the grid members on top. All said and told, it took about 4 hours to complete. Not a bad days work, and it looks great. Can't wait to see if with vines growing on it!

From 2009 Landscape


From 2009 Landscape

Sunday, April 26, 2009

Landscape April 2009 Progress

Before:

If February 2009, we had this pile of dirt delivered. You may recall that the truck got stuck.
From 2009 Landscape

... and, we got some rock delivered.
From 2009 Landscape

After:

Well, a lot can happen in three months, and it's not because the weather has cooperated.

The rock pile now looks a bit smaller.
From 2009 Landscape


The dirt pile isn't so much a pile anymore. The idea for this bridge came to me as I was building out the landscape stage.
From 2009 Landscape


As you can see here, I'm using a lot of the rock to build up retaining walls. Pretty nice considering just two years ago you couldn't iron this space any flatter.
From 2009 Landscape


And for a top down view. This is a picture of the landscape taken from the upstairs window.
From 2009 Landscape


... and a lot more to come! Happy spring.

Friday, March 6, 2009

Building Central Park

When I put the landscape plan on paper in late 07, I assigned each area of focus a name, and the area right in the center of the backyard is "Central Park". Central Park is one of the main focuses over the next few months as we lay the bones.

Inspiration and resources are critical to putting together a plan. One of my favorite resources is the Sukiya Living: The Journal of Japanese Gardening. This magazine is published once every three months and is filled with traditional Japanese truisms.

The Central Park area is "loosely" based on this garden staging concept:

From 2009 Landscape


...and when I say loosely, I mean loosely. This is the particular image I used to get the creative ideas rolling. I particularly like the way the layout conveys the idea of a hill/mountainside. Also, I'm going for a deconstructed rock wall border, because it feels more natural. Nature doesn't tend to stack rocks in perfect walls.

The next step is to turn this...

From 2009 Landscape


...into a picturesque landscape. Now, if I could just get the weather to cooperate!

Sunday, March 1, 2009

Dirt Delivery FAIL!

Two steps forward, three steps back.

In an attempt to stay on target with our 2009 landscaping plan, we had the first delivery of 15 cubic yards of soil dropped. The good news is that the soil is here. The bad news is that the truck that delivered the soil was also still here. For a bit, we thought it might be a permanent fixture in the yard.

If you've read about past projects on this blog, you're aware that our house is built on a wetland. Things tend to get wet and stay extremely wet throughout the entire winter and spring. Our property is primarily clay and combined with a high water table, it makes for a real challenge. That combined with a really heavy truck led to the front-end of the truck sinking in the yard. Looks like I've got a bit more work cut out for me to fix this mess. Enjoy the photos.

From 2009 Landscape


From 2009 Landscape


From 2009 Landscape


Stay tuned for the rock delivery next week. No, we will not be having this truck drop in the backyard!

Thursday, February 26, 2009

2009 Landscape Plan...

Over the past several weeks, I've begun putting together a landscape plan for the 2009 season. Last year was a productive year, but this year it gets a little more complicated. In 2009, I need to install the framing so that in 2010 and beyond, I can layer on the finishing touches.

In 2007 when we purchased the house, I put together a rough landscape plan, and that effort has paid off. Working from the plan, I've been able to keep track of what's done, what needs to be done, and how everything ties together as a whole. The big project last year was the pond and pathing, which is now mostly complete.

This year we'll be installing the remaining irrigation water lines, hauling in approximately 30 cubic yards of dirt, bringing in additional basalt rock to begin forming the main landscaping areas, clearing the existing driveway of brick piles etc., removing approximately 1300 square feet of the existing driveway to make room for an orchard, and then installing the brick patio areas for the outdoor kitchen and dining areas. According to my project plan, we should be able to get all that done between February and June.

Knowing the appropriate order to bring in materials to frame in the structure is very important. Example: last weekend I finished installing the water lines for the drip irrigation system and had to tear out the paths I built in a couple of locations. Had I installed all the irrigation lines earlier in the plan, I would have simplified the process. That's okay, because as a first time homeowner, this is all relatively new.

I'm pretty excited to see the 2009 year unfold. I'm excited to finally get to lay the bones for Central Park, which is the largest landscaping area directly in the middle of our back yard. I have finalized a rough design for this area, which includes Japanese gardening principles, with a twist of Northwest design, focusing primarily on Pacific Northwest Washington native plants. To top it off, I'll be throwing in a small rain-garden/wetland, which will act as a water collector and land-based filtration system. I'll elaborate on that more in a subsequent blog entry. I'm also excited about ripping out 1300 square feet of our driveway, and unveiling the soil underneath. With this area, I'll be building a vegetable garden, a kitchen dining room, and a small berry/fruit orchard.

We've got our work cut out for us, but I'm confident it'll be a productive Spring and Summer. What's not complete by the end of June will have to wait till 2010, and that's just fine. July through August of this year is reserved for painting the house, and doing other major house projects, such as pulling the popcorn ceiling out of the living room.

Until next time, happy dreaming!

Thursday, June 5, 2008

It was Summer last Week

With the teasing introduction to summer we've had here, our interior projects have slowed in favor of exterior projects.


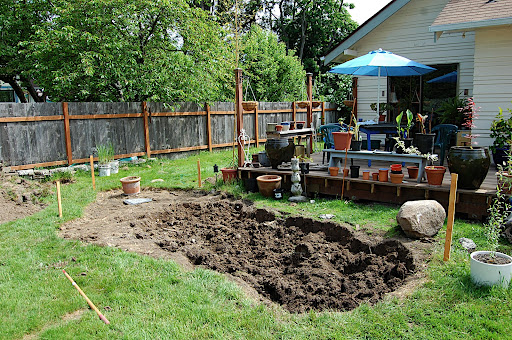
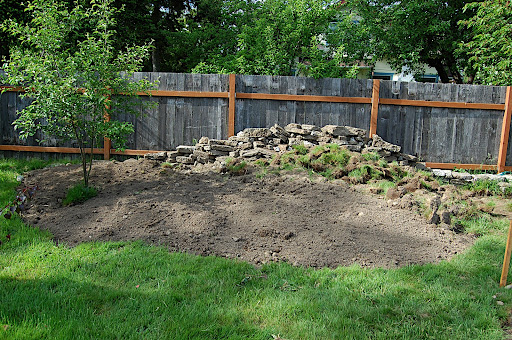
We have started to dig a pond just off the deck, and are using the fill dirt to build up the area our waterfall will cascade down from. We used concrete chunks to build up a retaining wall against our North property fence. Once the mound of dirt is finished, the concrete wall will not be visible. Our new pond is much bigger than our old pond in Seattle, which was constructed out of an old water bed frame that we found. Our new pond will reach a maximum depth of 3 feet, and is approximately 20 feet long and 12 feet wide. Once it's all done, it will be decorated in with large rocks, plants and landscaping.


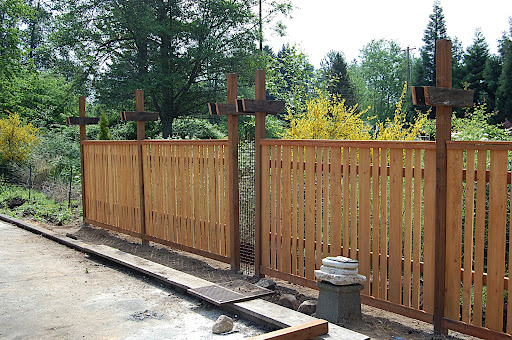
Boe whipped out 54 feet of the fence on Memorial day he's been planning for awhile. There are a couple of items remaining to complete the fence. He's going to add two cross horizontal pieces of trim boards onto the front of the fence to give it a more finished look. Then, he has to install the horizontal cross sections between the lentils at the top. And finally, he's going to trim in the trellis sections between the fence panels, which are made out of steel rock-sorting grates that I picked up from Second Use. All in all, we're very pleased with the outcome of the fence. Once it's finished off with landscaping and vines, it'll be a real masterpiece.