Showing posts with label landscape pond design. Show all posts

Sunday, October 3, 2010

Pond progress

This weekend I completed joining the two ponds together into one larger pond.

From 2010 Landscape


To join the ponds, I dug a section between the two, laid a new piece of liner, and fused the pieces together using an EPDM pond liner joining kit.

From 2010 Landscape


Shown here is one section of the two EPDM pond liners, with one piece braced to a 2x6 ready to be joined together.

From 2010 Landscape


Right after the sections were joined, and the water level was brought up. The connector section will be covered with a plank style bridge, so the two sections won't look so obviously joined together once complete.

From 2010 Landscape

Once the plank bridge and landscape rock is in place, I'll upload the final pictures.

Saturday, September 25, 2010

More pond progress

Made more progress on the pond this weekend. Got the skimmer attached to the liner, so that part of the project is now complete.

From 2010 Landscape


Started to drain our original pond into the new pond to bring the water-level down enough to allow me to fuse the liners together.

From 2010 Landscape


Next, we have to fuse the liner pieces together, install the bridge over the channel connecting the two ponds, and then trim the liner, fix the edging, and fill the remainder with water. Once all that is complete I can move the pump from the old pond into the new pond, and connect it to the new water lines running to the waterfall that I installed earlier in the year.

Saturday, September 18, 2010

Pond 2.0 continued...

I started out this year with great expectations. I think I got a little carried away because here I am at the end of the season with a bunch of projects to try and finish. I made some progress getting the second pond installed, which I'm hoping to partially complete before the end of the season. I originally wrote about this project a few months back.

I got the rest of the pond dug, the skimmer installed and the underlayment laid down. Next up is the install the liner and to begin building the inside walls of the pond using landscaping basalt rock. We already have a lot of rock for the project, but I suspect I may need to bring more in.

Here are some photos of the progress:

From 2010 Landscape


Pond is approx. 16" deep at the deepest point. This pond is intentionally more shallow than our original pond so that we'll be able to see the fish easier.

From 2010 Landscape


Underlayment installed. Next up, install EPDM liner.

From 2010 Landscape


Installed skimmer. This will house the pump, and will help to remove debris off the surface of the water.

Sunday, July 18, 2010

Pond 2.0

What's better than a pond? A larger one. We've thoroughly enjoyed our pond, but we've always wished it was bigger. Water is a very addictive thing. To enlarge our pond, we'll be building a second pond, and then joining the two ponds together. To enlarge our existing pond without building a second one would require deconstructing the entire thing. This just isn't an option right now.

Here is a picture that describes the idea:

From 2010 Landscape

The new pond will be a maximum of 20" deep to allow for easier installation of aquatic plants. Here is a picture of the new pond site being dug out:

From 2010 Landscape


In the back of the photo is the skimmer we'll be installing in the new section. My hope is that it'll make this new pond more maintenance free by collection more debris, leaves, etc.

Sunday, July 6, 2008

Bio-Bucket Filter

Week two of pond - The water is slime green. I mean, really slimy. The big bad green algae has set in, and from the looks of it, it's not leaving anytime soon. Sure, the water has to reach some type of yin/yang balance where the good is in balance with the evil. From the looks of it, the pond may need a little extra help to empower the good forces.

With my old pond, which was no more than 600 gallons, I used a 5 gallon bucket, placed a pump in the bottom with an outlet pipe raising up 2-4" below the water surface. I then filled the bucket with lava rock, places some filter pad over the top and sunk it to the bottom of the pond. It worked like a charm. The water was never crystal clear, but it maintained a pretty good balance. My new 3000 gallon pond is going to need a bit more than the bucket treatment.


Extreme conditions in the large pond calls for an extreme bucket! Pictured here is a 50ish gallon farm supply watering trough. A watering trough works better than most rubbermaid totes, because the plastic is thicker and it is less prone to bulging. Pictured here, the trough has two pipe bulkheads drilled through the side. The first is a 1" PVC line. This is the water inlet and will run from the pump in the pond to the filter trough. Unlike the filter bucket mentioned earlier, this system remains outside the pond. In fact, this filter is sitting on the side of the house right next to the air conditioner. Eventually, I'll build a fence wall around all this utility stuff. The second bulkhead is a 2" water outlet. Water will run out of this hole into a 2" flexible pipe which will transport it back to the pond.


In this image, you're looking into the top of the trough. I have placed a grid on a number of bricks, which provides a platform on the inside of the filter unit. Eventually, the pipe you see jetting out in the picture (water inlet) will go down through the grid, where the water will be injected into the bottom of the trough. Filter medium will be placed on top of the grid. Why the space at the bottom of the trough below the grid you ask? This is an area that will allow filter scum/sludge to accumulate.

This is a biological filter unit. Colonies of good bacteria form on the filter medium, water passes through it, and the bacteria eat the evil out of the water (including algae).

I plan on going one step further with my filter. I'm going to put a UV filter inline on the water inlet, which will nuke the chlorophyll that then gets stuck in the filter that the bacteria then eats. Guess what - the bacteria also produces a bi-product waste. This waste (fertilizer) plants love and can eat thus producing oxgyen for your pond. Whew... that's one heck of a cycle of life!

I'll keep you posted on the success of my homemade filter.

Thursday, June 5, 2008

It was Summer last Week

With the teasing introduction to summer we've had here, our interior projects have slowed in favor of exterior projects.


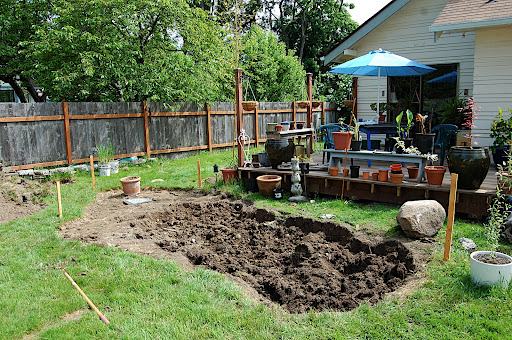
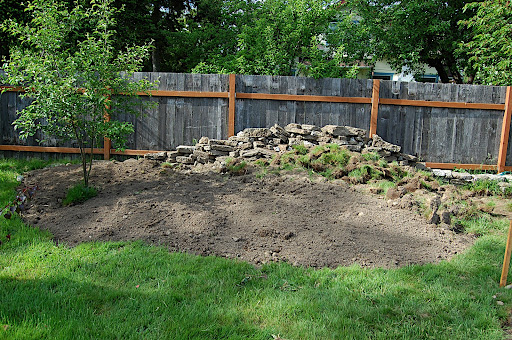
We have started to dig a pond just off the deck, and are using the fill dirt to build up the area our waterfall will cascade down from. We used concrete chunks to build up a retaining wall against our North property fence. Once the mound of dirt is finished, the concrete wall will not be visible. Our new pond is much bigger than our old pond in Seattle, which was constructed out of an old water bed frame that we found. Our new pond will reach a maximum depth of 3 feet, and is approximately 20 feet long and 12 feet wide. Once it's all done, it will be decorated in with large rocks, plants and landscaping.


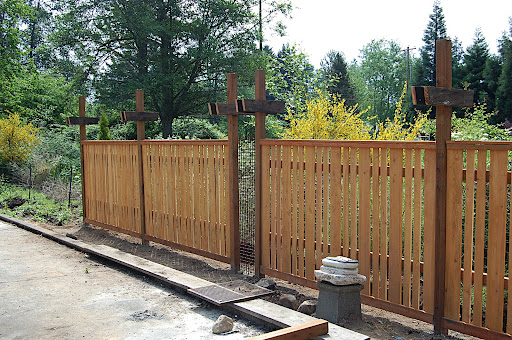
Boe whipped out 54 feet of the fence on Memorial day he's been planning for awhile. There are a couple of items remaining to complete the fence. He's going to add two cross horizontal pieces of trim boards onto the front of the fence to give it a more finished look. Then, he has to install the horizontal cross sections between the lentils at the top. And finally, he's going to trim in the trellis sections between the fence panels, which are made out of steel rock-sorting grates that I picked up from Second Use. All in all, we're very pleased with the outcome of the fence. Once it's finished off with landscaping and vines, it'll be a real masterpiece.

Wednesday, December 26, 2007

Planning the lanscape

I'm very excited about the opportunity to landscape our bungalow, but at the same time, a little nervous about the task. Designing in a craftsman style is very much about bringing the outside in and bringing the inside out. A craftsman bungalow should be comfortable, and it should blur the lines between the inside living room and the outside living room. Kurt and I spend a tremendous amount of time outside and it is important to us to have "rooms" available to us for reading, dining, or whatever it is we want to do. I've been reading a number of books to harvest design ideas, and one of my favorites at the moment is Naturalistic Gardening by Ann Lovejoy. The book features two photographs that are driving my latest outdoor landscaping obsession. Drum roll please....

Above photo: I love water, and plan on having a lot of it when I get done with the landscape. This is one of the first photographs in the book, and it instantly appealed to my senses. In the background, you see the porch with the pergola like rafters. I particularly like the textures in the foliages and the contrast in colors.

Above photo: What isn't to like here? Just looking at this photo makes be relaxed. What if this Japanese style bridge stretched across the pond and terminated on the other side by entering into a Japanese style tea house? I feel relaxed just thinking about it.

Okay, so where are we now and how will these design features fit into the current landscape?

Welcome to my back yard. This picture is taken about 1/4 of the way back. The back yard is about 80 feet deep. The first order of business will be to square off the back deck and get rid of the 45 degree angle corners. The deck is *huge* as it exists today, and we'd rather use the space for plants, etc. We'll be using the deck board we pull off to continue the deck on around the house (picture of that later). The inset portion of the home with the 1960's sliding glass doors will be an outdoor living room, and will be framed in with a pergola roof. From the corner of the deck, you'll be able to look over into the water. I've laid the water hose out as an example shape for the pond, but have yet to determine the final shape. The bamboo poles on the ground represent the bridge which will run to the tea house. The tea house will sit a little to the left of where the photograph was taken. Eventually, I'll upload a drawing of this layout so that it makes a more sense.

The sliding glass doors will eventually be replaced with craftsman type glass doors. They will open out onto the outdoor living room. From the outside living room, you'll be able to see the water and the fish (potentially Koi), and there will be a step down from the deck onto the bridge that will lead you to the tea house. The tea house will be the ultimate place for relaxation and meditation. I have yet to determine the exact design for the tea house.

I can just picture this in my mind, and what an amazing backyard experience it will be!